Seo Panel Customizer
Customizer plugin for SEO Panel lets you fully rebrand and personalise your SEO Panel installation. Change the logo, site name, navigation menus, custom page content, social links, and inject custom CSS or JavaScript — all without touching the core code.
The plugin menu provides the following sections:
- Blog Management – Create custom content pages to replace Home, Support and About Us
- Site Details Management – Update logo, favicon, site name, title, meta tags and social links
- Menu Manager – Customise navigation menu colours for Guest, User and Admin menus
- Menu Item Manager – Add, edit and reorder menu items across all menus
- Menu Translator – Translate menu item labels into multiple languages
- Style Manager – Inject custom CSS or JavaScript for any installed theme
Blog Management
Blog Management lets you create rich content pages that can replace the default Home, Support and About Us pages of your SEO Panel installation. Each blog supports multilingual content, SEO meta fields and a feature image.

The blog list can be filtered by Keyword, Status (Active / Inactive) and Link Page (Home, Support, About Us).
Creating a New Blog
To create a new blog:
- Click Add New Blog
- Enter a Blog Title
- Write the Blog Content using the built-in TinyMCE rich text editor (supports images, links, tables, code blocks and more)
- Optionally upload a Feature Image (JPG, PNG or GIF — recommended 1200×630 px)
- Enter a Blog Meta Title (50–60 characters recommended)
- Enter a Blog Meta Description (150–160 characters recommended)
- Enter Blog Meta Keywords (comma-separated)
- Select the Language
- Enter Tags (comma-separated)
- Select the Replace Page — choose which default page this blog will replace:
- Home — replaces the SEO Panel home page
- Support — replaces the support page
- About Us — replaces the about us page
- Click Proceed to save
Blog Actions
Each blog in the list supports the following actions:
- Activate / Inactivate – Toggle the blog’s published status
- Edit – Modify any blog field
- Delete – Remove the blog permanently
Site Details Management
Site Details Management lets you customise the core branding and identity of your SEO Panel installation.
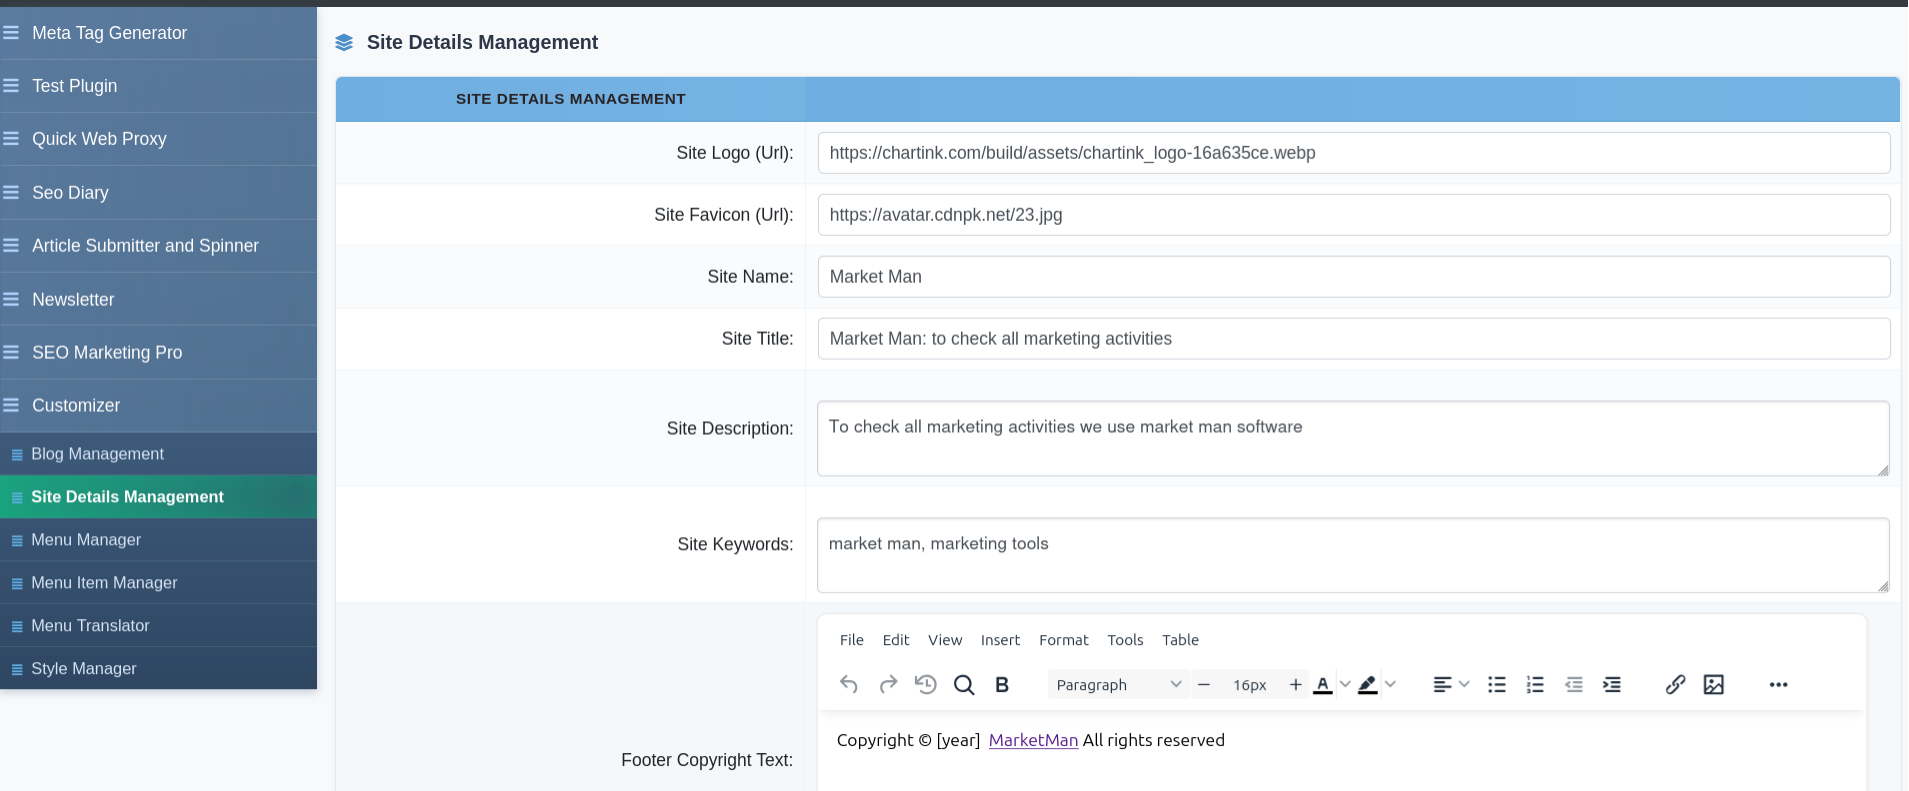
The following fields are available:
- Site Logo (URL) – URL to your logo image (recommended size: 131×31 px)
- Site Favicon (URL) – URL to your favicon file
- Site Name – Display name shown in the panel header (max 25 characters)
- Site Title – Browser tab title for the panel
- Site Description – Meta description for the panel’s home page
- Site Keywords – Meta keywords for the panel’s home page
- Footer Copyright Text – Custom footer text with rich-text editor support; use
[year]as a placeholder for the current year - Facebook Page URL – Link to your Facebook page shown in the panel
- Twitter Page URL – Link to your Twitter/X page
- Contact URL – URL for the Contact link in the panel
- Help URL – URL for the Help link
- Support URL – URL for the Support link
- Disable News – Check to hide the news feed from the panel
- Custom Menu – Check to activate custom menu items defined in Menu Item Manager
Click Proceed to save all changes.
Menu Manager
Menu Manager displays the four navigation menus available in SEO Panel and lets you customise their visual appearance.
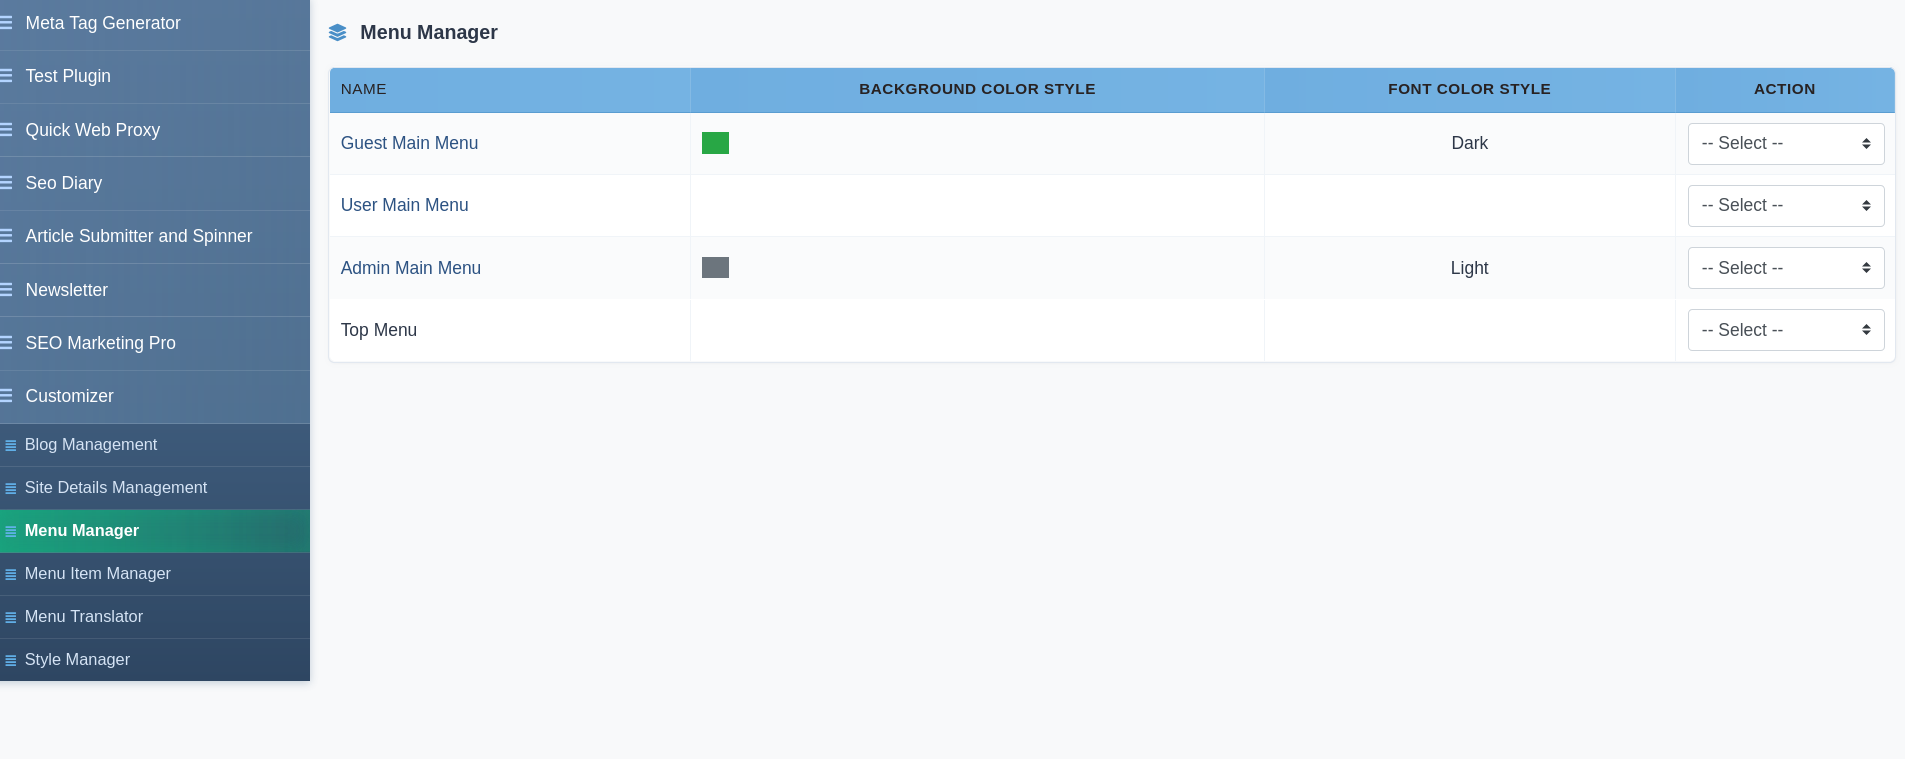
The four menus are:
- Guest Menu – Shown to logged-out visitors
- User Menu – Shown to regular logged-in users
- Admin Menu – Shown to administrators
- Top Menu – The top navigation bar (colour not customisable)
For each menu (except Top) you can set:
- Background Color Style – The background colour class for the menu bar
- Font Color Style – The text colour for menu links
Click the menu name or select Edit from the action dropdown to change its colours, then click Proceed to save.
Selecting Menu Item Manager from the action dropdown jumps directly to the items for that menu.
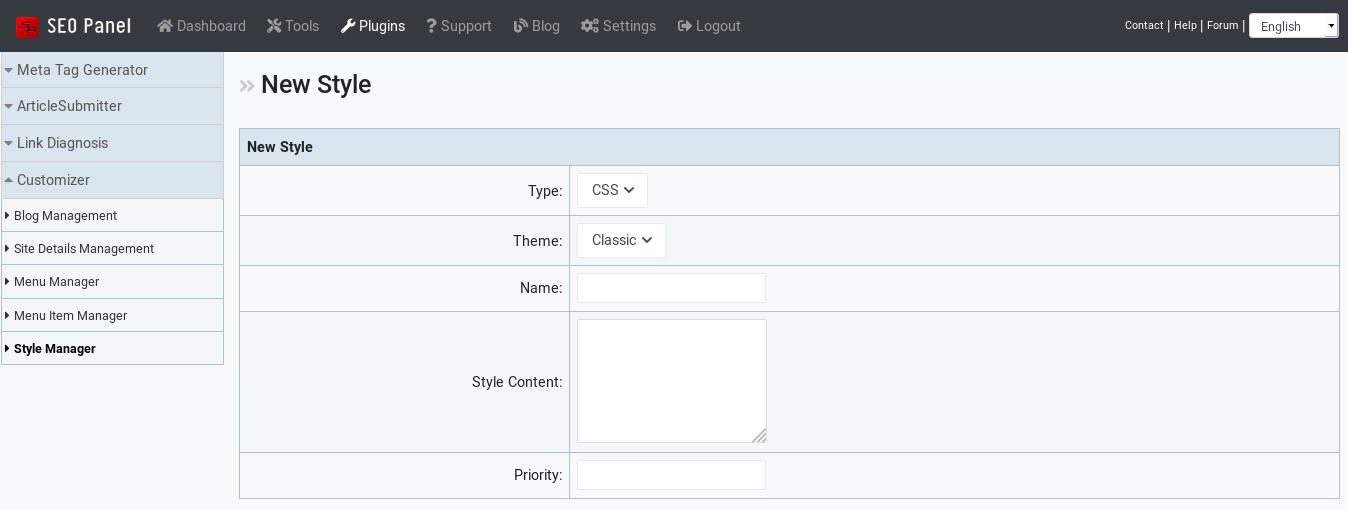
Style Manager
Style Manager lets you inject custom CSS or JavaScript into any installed SEO Panel theme — useful for visual tweaks, branding overrides or adding third-party widgets without modifying theme files.
The style list can be filtered by Theme and Type (CSS or JS).
To create a new style:
- Click New Style
- Select the Type —
cssorjs - Select the Theme Name the style applies to
- Enter a Name to identify this style entry
- Enter the custom Content (CSS rules or JavaScript code)
- Set the Priority — lower numbers are applied first
- Click Proceed to save
Style Actions
- Activate / Inactivate – Enable or disable the style without deleting it
- Edit – Modify the style content or settings
- Delete – Remove the style permanently